Steps to integrate Sequel carrier
Sequel Carrier Setup Guide
Step-by-step with screenshots. blue boxes in each image mark where to click.
This article offers a step-by-step walkthrough to help you with the carrier configuration process of Sequel carrier. This is B2B carrier.
Step-by-step with screenshots. blue boxes in each image mark where to click.
This article offers a step-by-step walkthrough to help you with the carrier configuration process of Sequel carrier. This is B2B carrier.
Step 1: Log in to your eShipz account.
Step 2: Go to Settings.
Step 3: Click on Integrations and select Carrier Configuration
Step 4: Open Carrier Configuration and search for the carrier.
Select Sequel from the list of available carriers. Use the search box to type the carrier name (e.g. "Sequel").
If multiple Sequel carriers are available. The system will narrow the "Other Carriers" grid to display only the available service variants for the selected carrier.
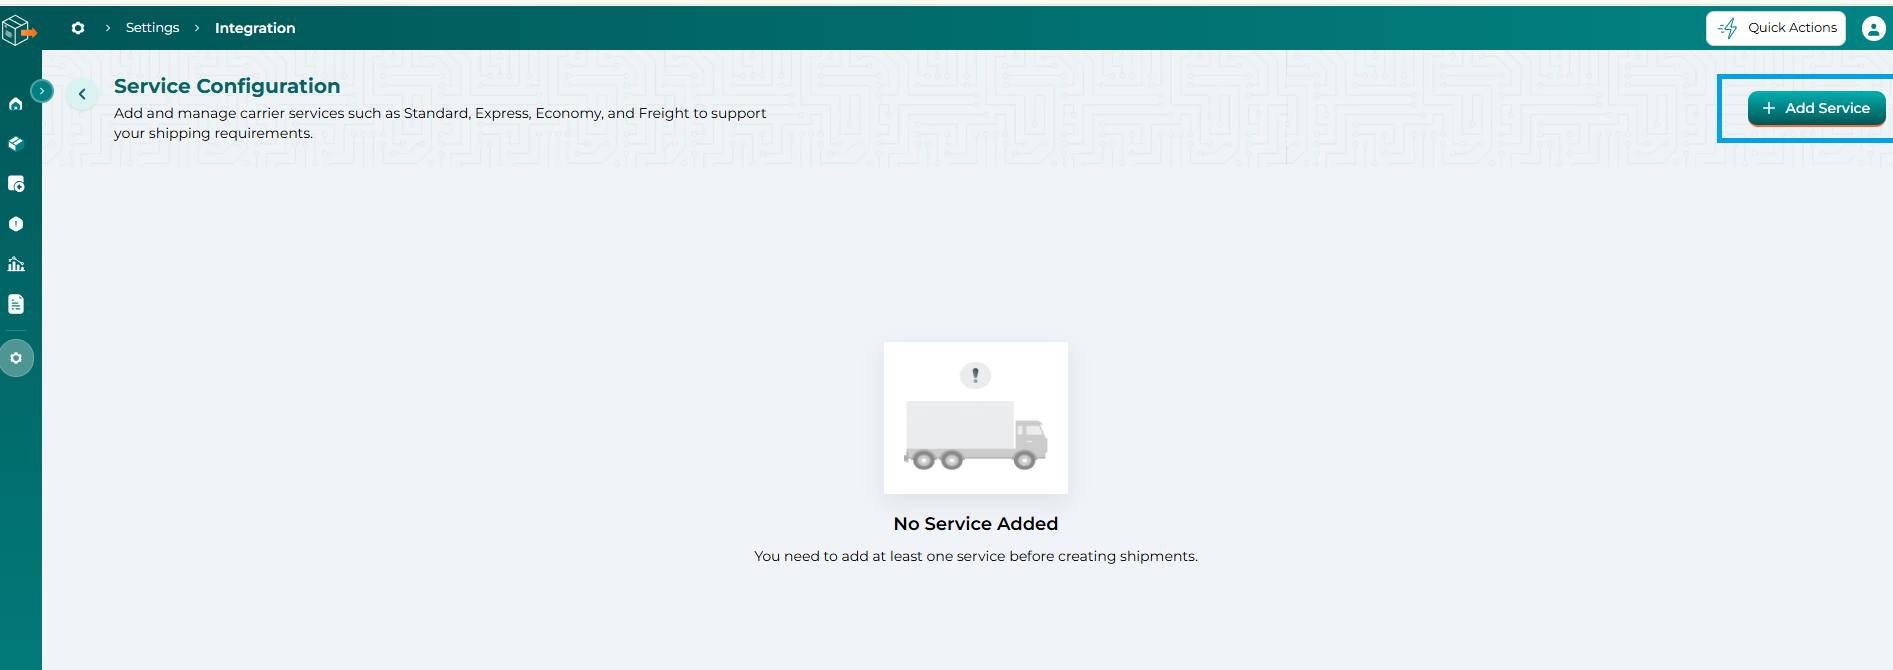
Step 5: Click + Add Service in the top-right corner of the page.
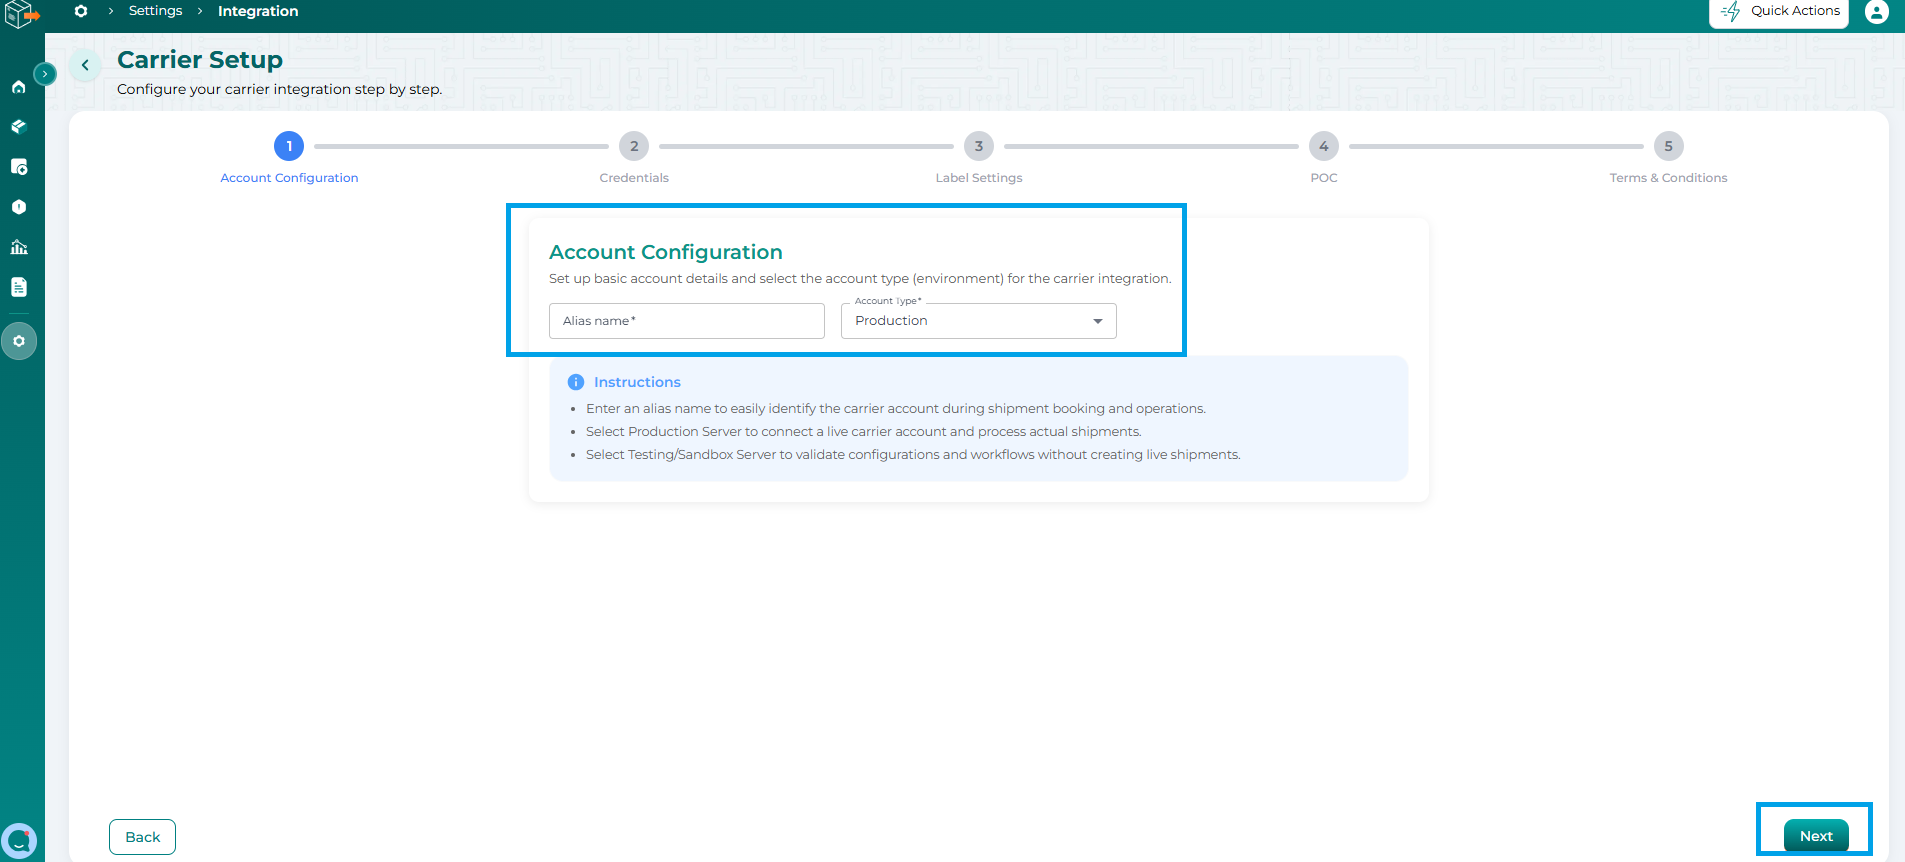
Step 6: Fill Account Name
On the Account Configuration tab, enter an Alias Name to easily identify this carrier account during shipment booking and operations, and select the Account Type (Production or Testing/Sandbox). Click Next to continue to Credentials.
Step 7: Fill in all the required fields with the appropriate details and click on Next.
Note : The Credentials will be given by the Carrier team as per the agreement and contract as per the Customer and click Next.
- Token
The Credentials tab shows a Service Type list on the left side
Supported Service Types:
- D&3_Valuable
- D&3_Vulnerable
- ECOM_Small_Value_Domestic
Note
- Use Carrier Label – Enable if the carrier provides its own shipping label.
Step 8: Click Upload Logo to upload the image that you want to display on the shipping labels.
- Supported file formats: PNG, GIF, and JPEG.
- If no logo is uploaded, the labels will be generated without a logo.In Label Settings there are several label formats mentioned, sample templates for the same can be viewed by clicking on ‘How Doesit look?’, which is present just beside the format name. Based on the format of label required,
choose the options under Label Settings. If none of the options are selected then the default label will be generated in Sequel Custom-Default Label (A5/A4) format after shipment creation.
Step 9: Product Mask – By default, the item description is displayed on the shipping label.
If you want to mask the item description with a custom name, enter the desired value in the Product Mask field on the Shipper Account page. The value entered in this field will be displayed on the shipping label instead of the actual item description.
- Message - Enter the desired Message in this field. The text entered here will be displayed at the bottom of the shipping label. Please refer to the sample label image for reference.
2. Shipper Settings - The following options are available under Shipper Settings:
- Hide Shipper Address on Label – Hides the shipper's address from the shipping label.
- Hide Shipper Name on Label – Hides the shipper's name from the shipping label.
- Hide Shipper Company on Label – Hides the shipper company's name from the shipping label.
- Hide Entire Shipper Details on Label – Hides all shipper details from the shipping label.
- Hide Entire Return Address on Label – Hides the complete return address from the shipping label.
- Hide Invoice Value on Label – Hides the invoice value from the shipping label.
Step 10: Add a Point of Contact (Optional)
This step is optional - The POC section allows you to add and manage Points of Contact for smooth communication related to operations, support, escalations, and pickup coordination.To designate a contact as the primary Point of Contact for the carrier account, enable the "Set as Default POC" option. You can skip this step and add a POC later if you don't have the details on hand.
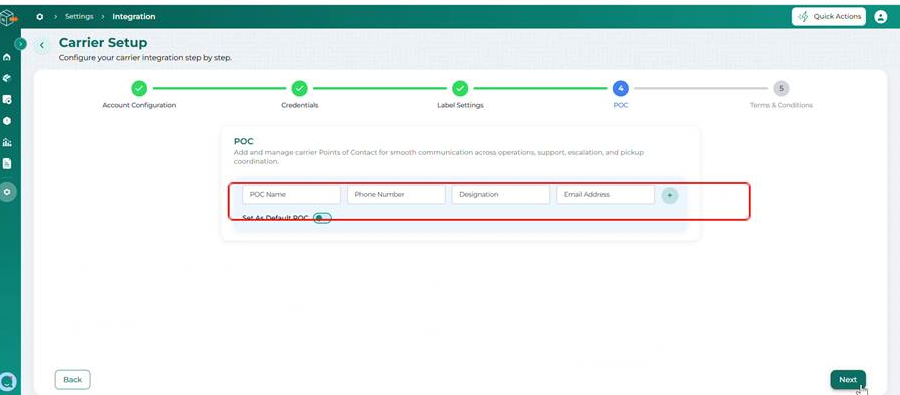
This step is optional - The POC section allows you to add and manage Points of Contact for smooth communication related to operations, support, escalations, and pickup coordination.
To designate a contact as the primary Point of Contact for the carrier account, enable the "Set as Default POC" option. You can skip this step and add a POC later if you don't have the details on hand.
Step 11: Accept Terms & Conditions and Save
Read the Carrier Terms and Conditions, check "I have read and agree to the carrier Terms and Conditions," then click Complete (Validate & Save).
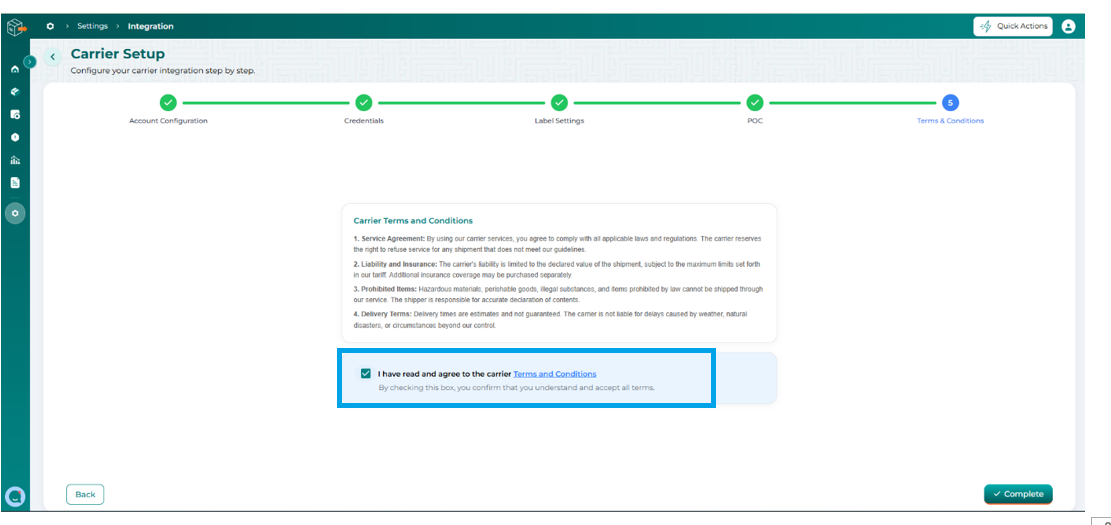
Read the Carrier Terms and Conditions, check "I have read and agree to the carrier Terms and Conditions," then click Complete (Validate & Save).
Step 12: Confirm the account is active
Once the configuration is completed successfully, the message "Service updated successfully!" will be displayed on the Service Configuration page.
Once saved, eShipz shows a "Service updated successfully" confirmation and takes you to the Service Configuration summary, where all setup steps (Account Configuration, Credentials, Label Settings, POC, Terms & Conditions) show green checkmarks. Two additional optional sections are also available here:
• Pincode, EDD & AWBs Uploads
• Freight Audit Settings
You can now create shipments using the configured carrier.