Guide to integrate Zoho Inventory with eShipz
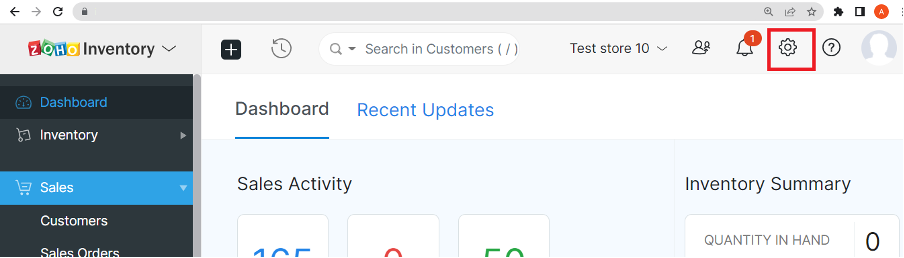
Image No: 1.1
STEP 2: On the Settings page click on ‘Automation’[Refer Image No: 1.2]
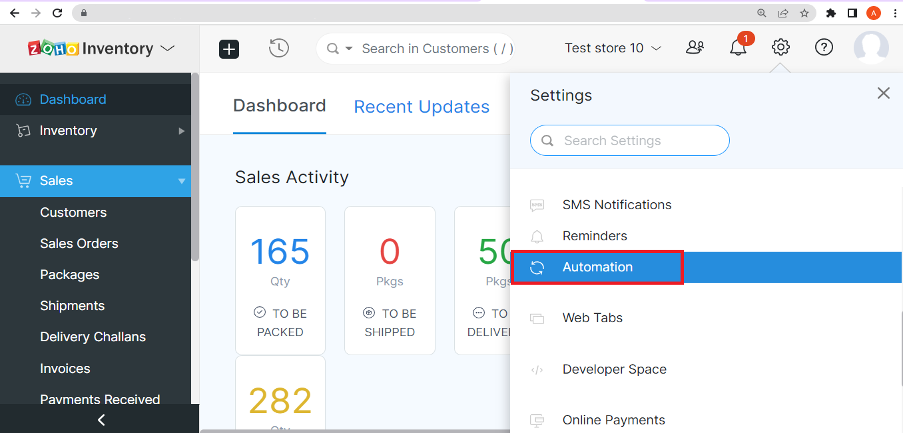
Image No: 1.2
STEP 3: On Automation page click on webhooks and on webhooks page click on ‘New Webhook’ button [Refer Image No: 1.3]
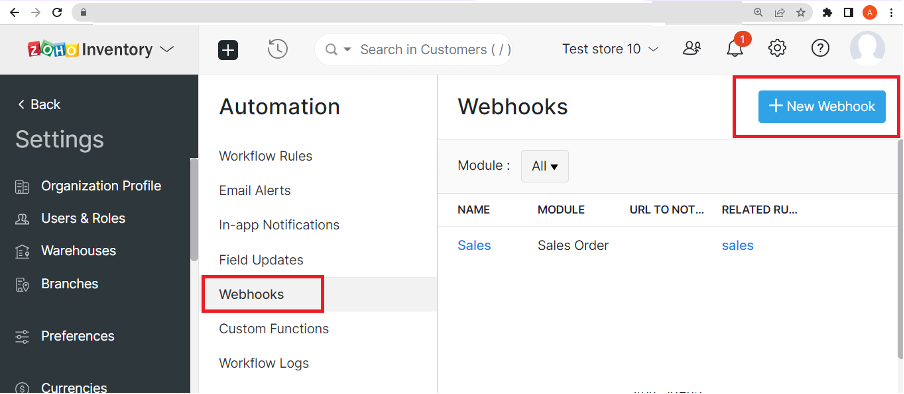
Image No: 1.3
STEP 4: New Webhook page will be displayed [Refer Image No: 1.4]
Name: Provide the name
Module: select ‘Sales order’ from the dropdown
URL to notify : https://orders.eshipz.com/webhook/zoho_xxxxxxxxxxxxxxxx?store_id=xxxxxxxxxxxxxxxxx
click on ‘save’
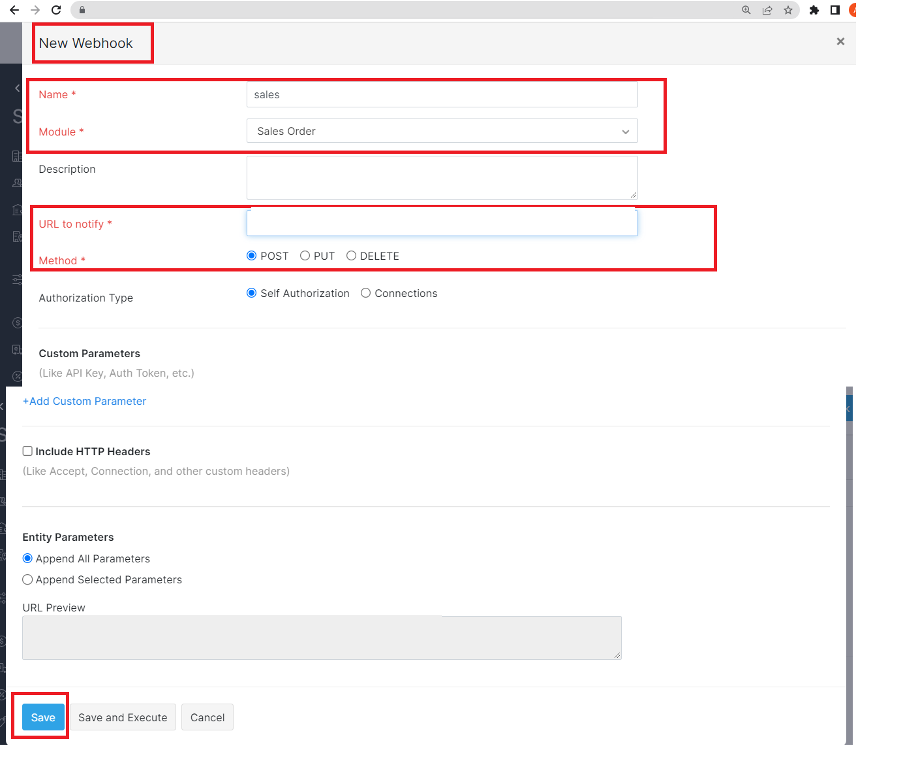
Image No: 1.4
This is how we successfully setup the webhooks
How to setup workflow for zoho?
STEP 1: On the Automation page click on ‘Workflow Rules’ and on Workflow Rules page click on ‘New Workflow Rule’ [Refer Image No: 2.1]
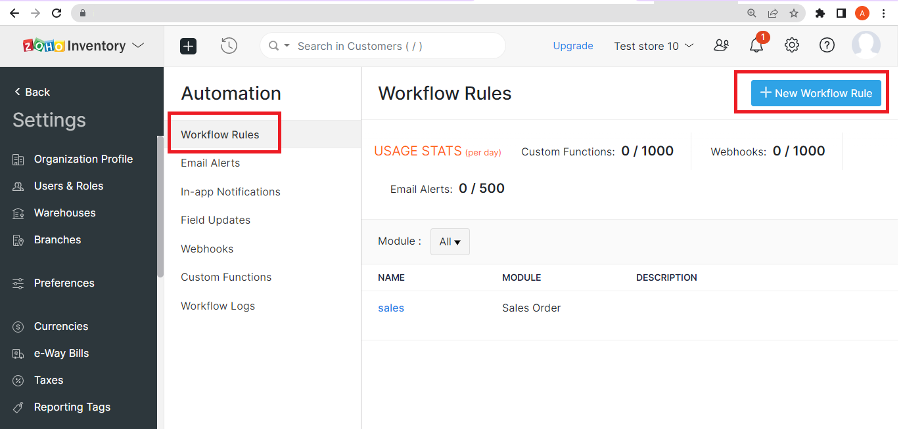
Image No: 2.1
STEP 2: Steps to setup workflow rules
1.New Workflow Rule
Workflow Rule Name: Set the name of the workflow.
Module : Select ‘sales order’ from the dropdown’ and click on ‘Next’
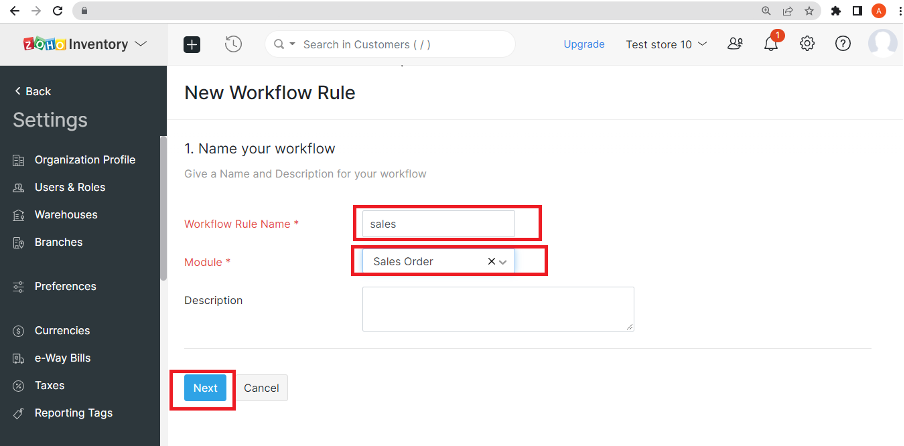
Image No: 2.2
2.Choose when to Trigger
Workflow type: choose ‘Event Based’ from dropdown.
When an Sales Order is: choose ‘Created or Edited’ radio button.
Execute the workflow when: choose ‘When any field is updated’ from the dropdown and click on ‘Next’
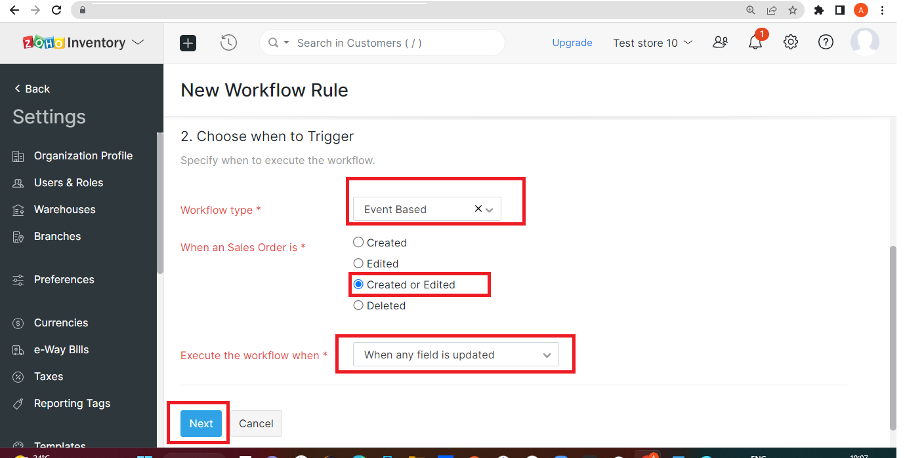
Image No: 2.3
3. Filter the triggers
Select ‘sales order’ from the ‘Select the field’ dropdown and from the ‘select the comparator’ dropdown choose ‘is not empty’.
Select ‘Everytime’ radio button and click on ‘Next’

Image No: 2.4
4. Actions
Under Immediate Actions
TYPE dropdown: choose ‘Webhooks’
NAME dropdown: The workflow name which u have set [Refer Image No: 2.1] will be popped up , select the name from dropdown and click on ‘Save’
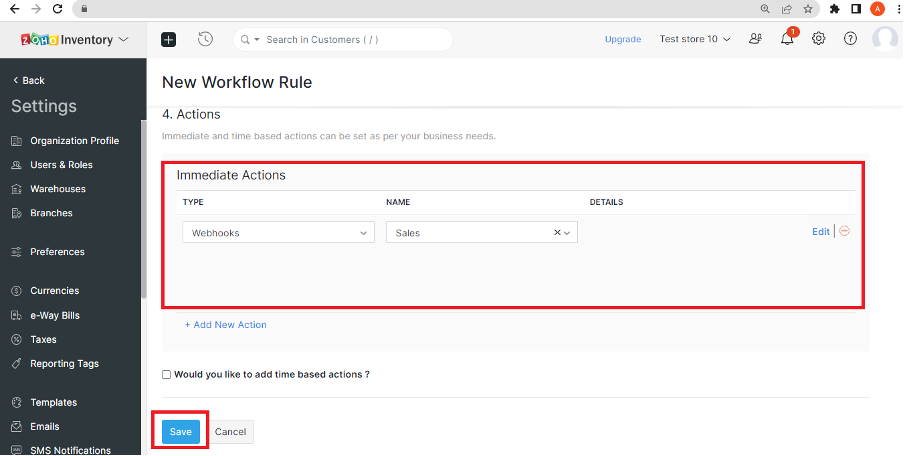
Image No: 2.5
How to generate the credentials for Zoho Inventory?
STEP 1: Login to zoho api console https://accounts.zoho.com/signin?servicename=AaaServer&serviceurl=%2Fdeveloperconsole
The user has to sign with a registered mail id which was given on Zoho account creation.
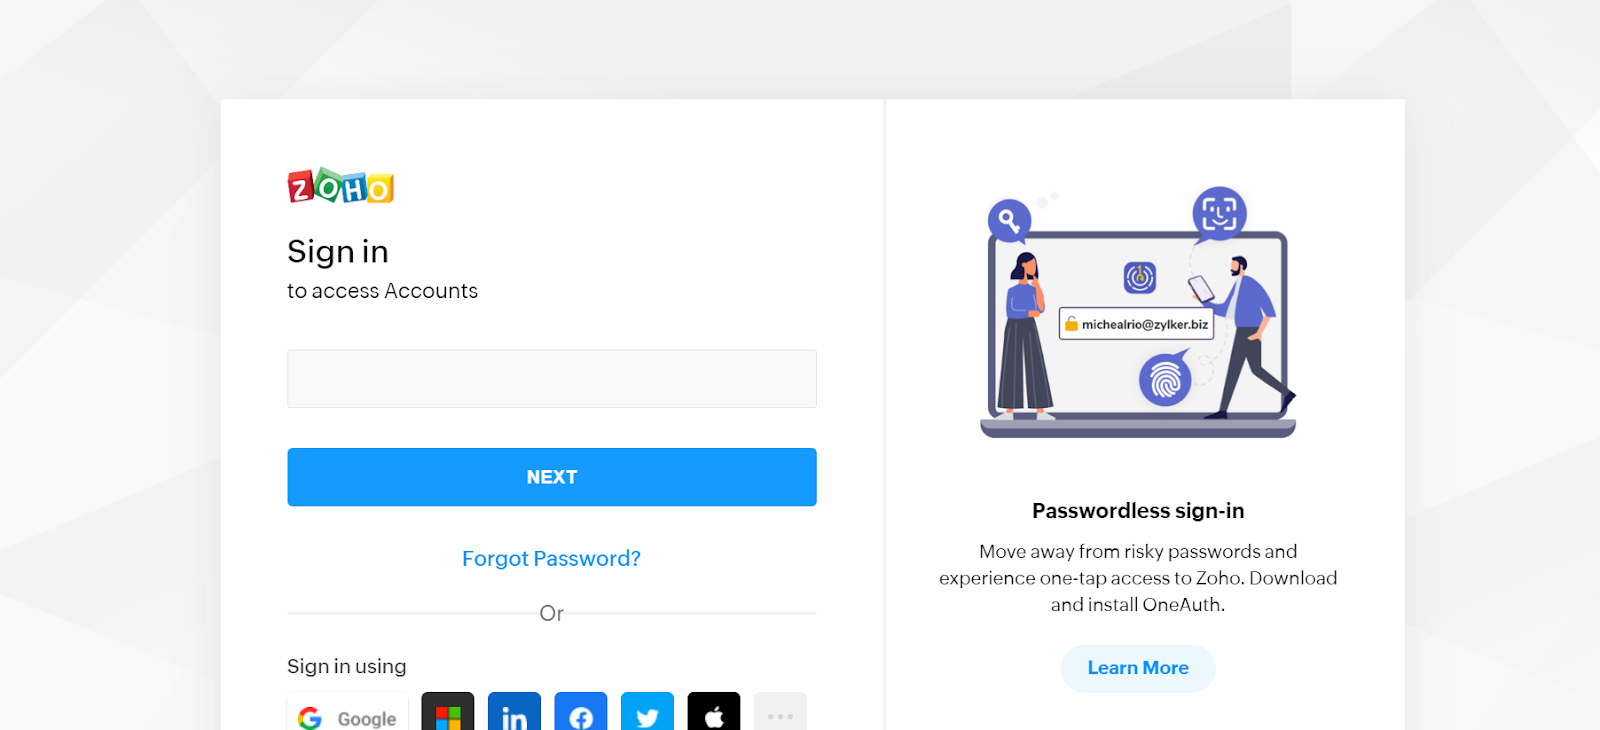
Image No: 3
STEP2: After entering the registered mail id and password, User need to choose the Client type as Server-based Applications.

Image No: 4
Homepage URL: https://www.zoho.com/in/inventory/
Authorized Redirect URIs: https://orders.eshipz.com/oauth
and click on ‘Create’
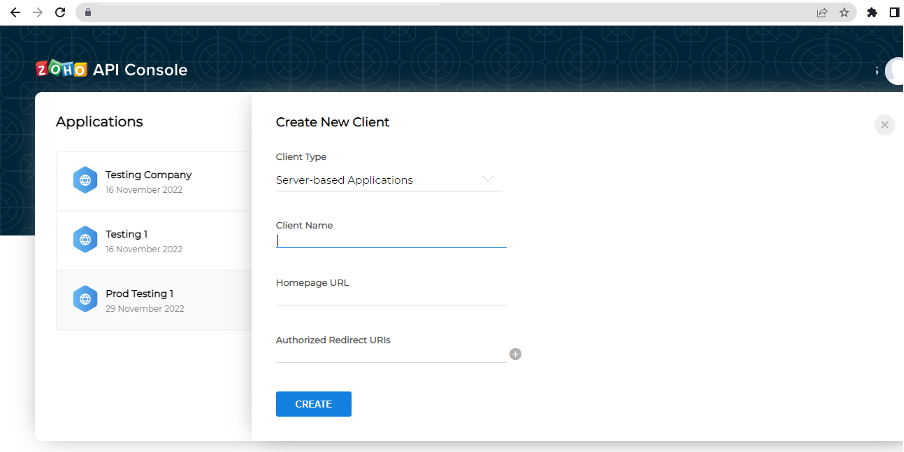
Image No: 5.1
Here the Client ID and Client Secret is displayed [Refer Image No: 5.2]
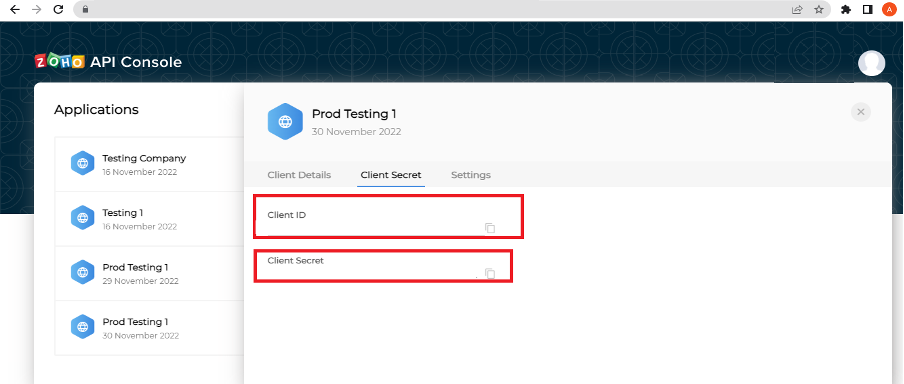
Image No: 5.2
STEP 4: For Zoho Organization ID we can find on Zoho Inventory page , On the dashboard of Inventory page click on Profile icon we can see Organization ID
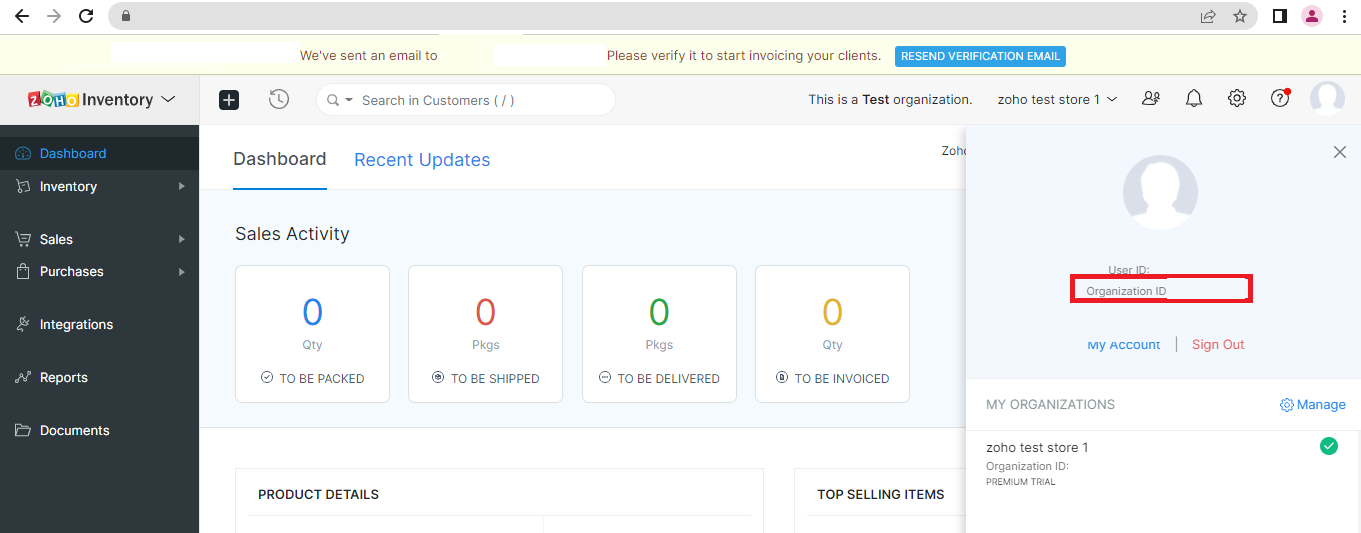
Image No: 6
STEP 5: On eShipz page user has to click on Settings and then Sales Channel as shown in the below image.
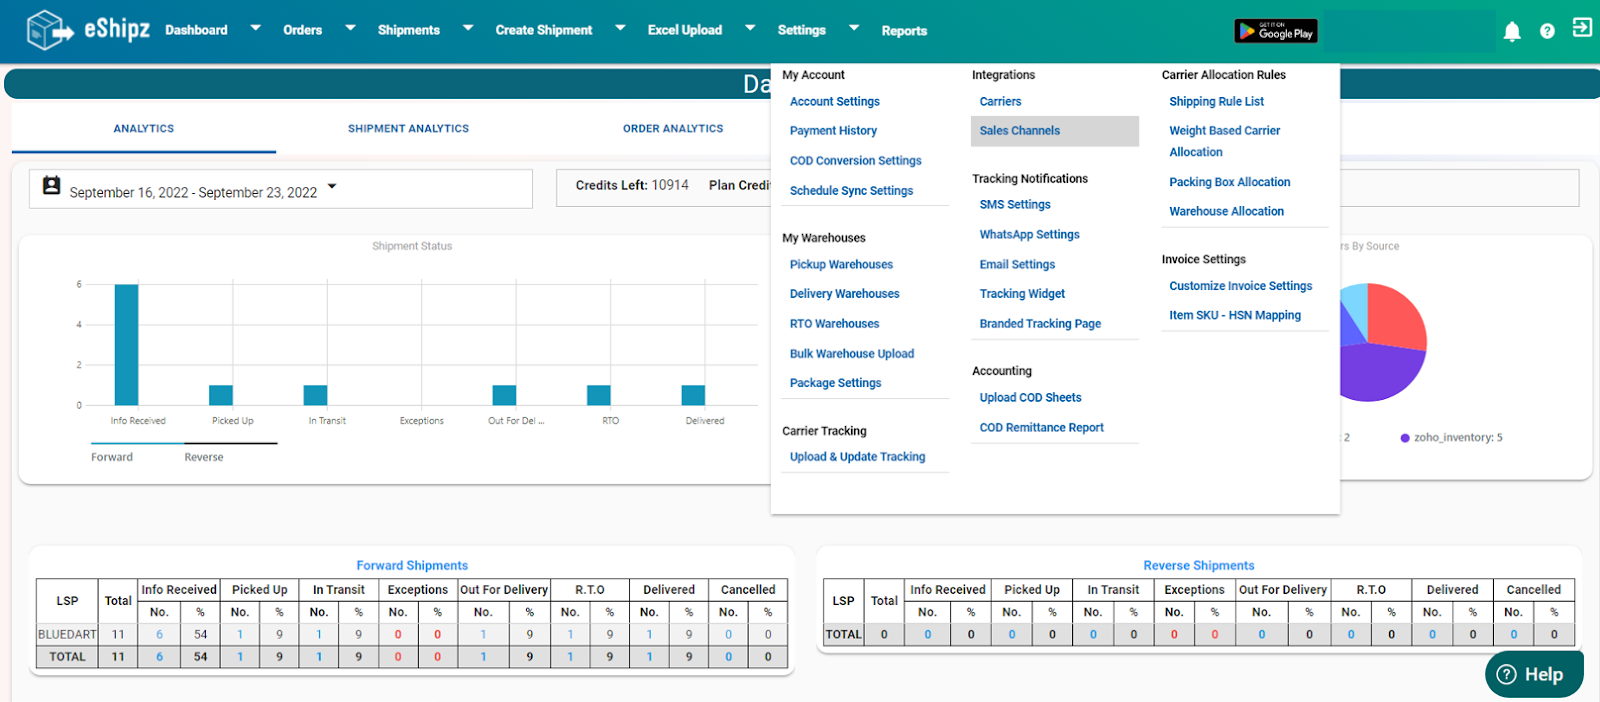
Image No: 7.1
Channel settings page has been displayed the user has to click on Zoho on Configuration Sales Channel.

Image No: 7.2
The user has to fill in the Client id, Client secret [Refer Image No: 5.2] and Organization id [Refer Image No:6] and then check the Active Channel checkbox and save the details by clicking on the save button.
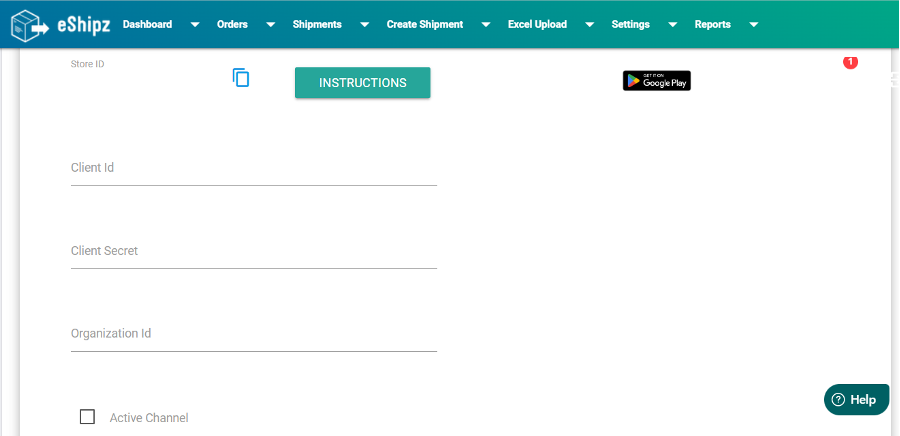
Image No: 7.3
This is how we Integrate the zoho inventory to eShipz
Limitations:
For Merge orders update status will not work
we can create only prepaid orders for zoho inventory
For split orders any of the parent /child awb will get updated
For zoho inventory [Multiple stores: 3 stores update status is not working from create shipment page, through Automation filters and My Shipments page
Related Articles
How to Get Started with eShipz?
Getting started with eShipz is a straightforward process designed to quickly integrate the platform with your existing operations. The goal is to move from manual, fragmented logistics to an automated, centralized system with minimal friction. Here ...Steps to configure Zoho Inventory store to eShipz.
Part 1: eShipz Configuration Step 1: Log in to your eShipz account. Step 2: Go to Settings. Step 3: Select Sales Channel. Step 4: Click on Zoho Inventory. Step 5: Copy the Organisation ID from your Zoho Inventory store and paste it into the ...How to Integrate Zoho Commerce store with eShipz?
STEP1: Login to the zoho commerce store , click on ‘Settings’ tab[Refer Image No:1] Image No:1 STEP2: Click on ‘Organization Profile’ [Refer Image No:2] Image No:2 STEP3: Copy the ‘Organization ID’ [Refer Image No:3] Image No: 3 STEP4: Go to eShipz ...Guide to integrate LOGIC ERP with eShipz
Step 1: Create an ehipz account and integrate your contracted courier partners / carriers via the settings tab in your eShipz dashboard. Step 2: Upon completion of carrier / courier partner integration, generate a dummy label for testing to confirm ...Steps to integrate eShipz connector in Unicommerce
This guide provides the necessary steps to set up eShipz as a shipping provider within your Unicommerce (Uniware) account. This integration is essential for automating AWB generation, label printing, and tracking for orders processed through Uniware. ...