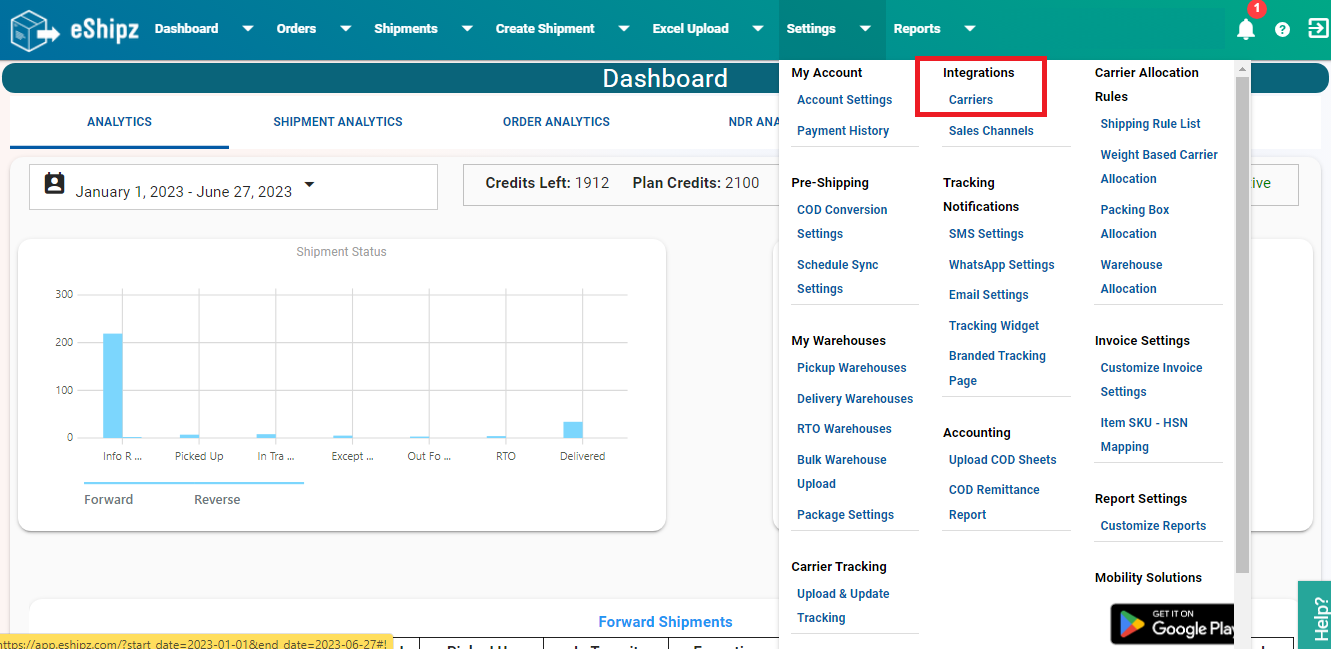
Steps to integrate Dotzot Carrier
Image:1
The “Shipper Accounts” page will now be displayed. Click on the ‘+’ icon visible at the top right corner.

Image:2
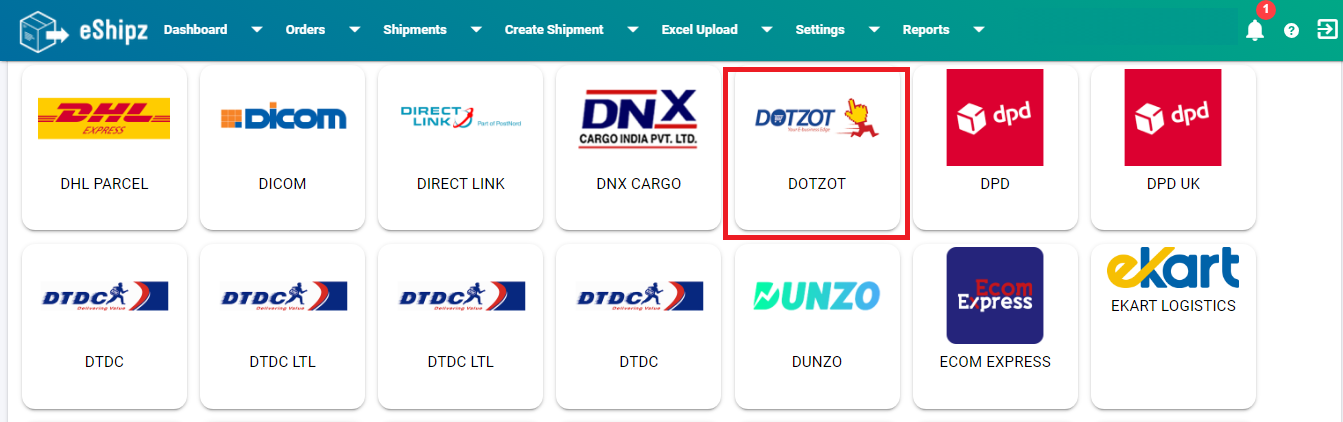
The “Select Carrier” page will now be displayed and you can choose “DOTZOT” carrier from the list.
Image:3
STEP 4:
“Add Shipper Account For Carrier” page will now be displayed.
Fill the valid details in ‘Account Type’, ‘Description’, ‘Customer code’ fields.‘Service type’: Scroll down till Service Types, which will be displayed below the “I Agree to the Terms & Conditions of the Carrier” checkbox, Image:4.2 represents the valid services that DOTZOT carrier offers, based on the service enabled for your account, copy the services mentioned below Service Type and enter on ‘Service type’ field in Image:4.1, in order to enter more than one service add a comma after every service.
Service Types include [Express. Economy, Plus]
Image:4.1
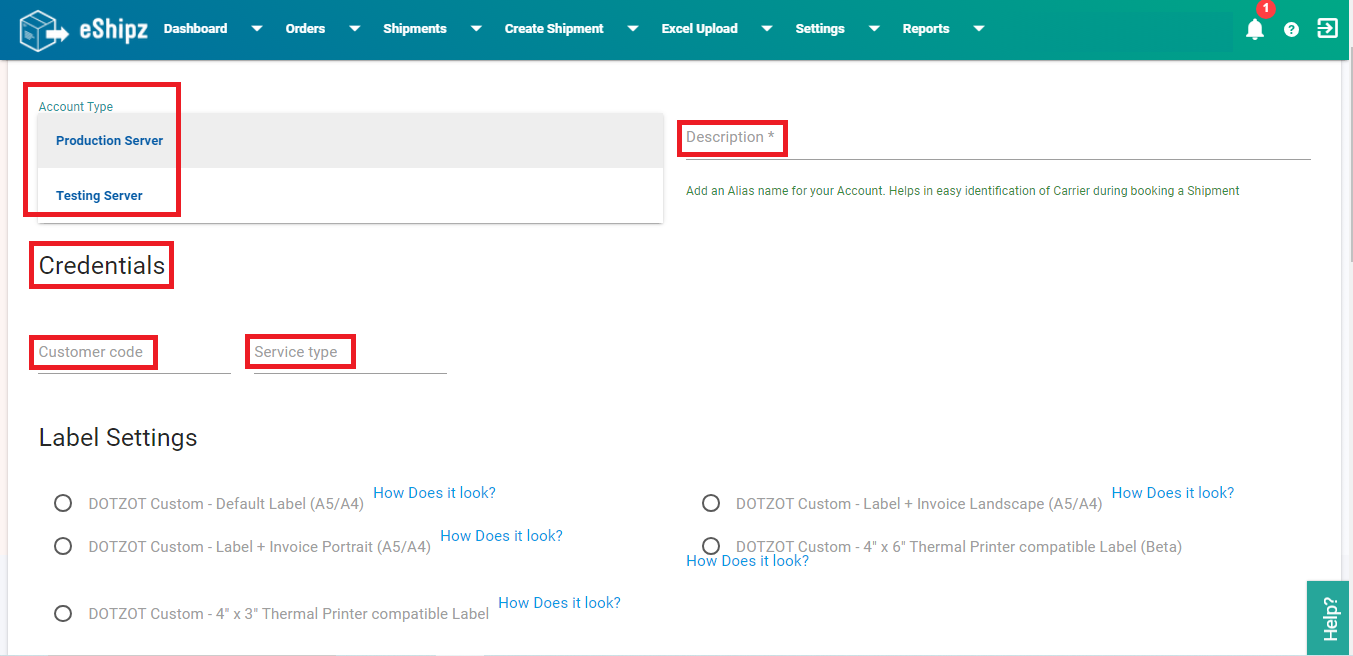
Image:4.2

STEP 5:

Image:5
STEP 6:
Image:6

STEP 7:
Image:7

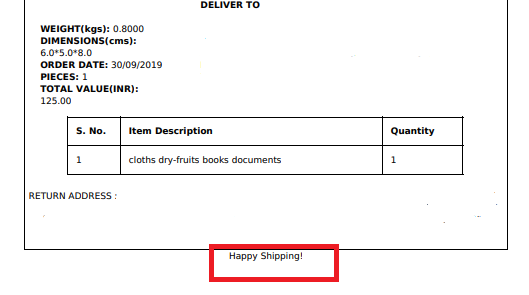
“Message”, data entered in this field will now be displayed at the bottom of the label refer Image:8.2.
Image:8.1

Image:8.2
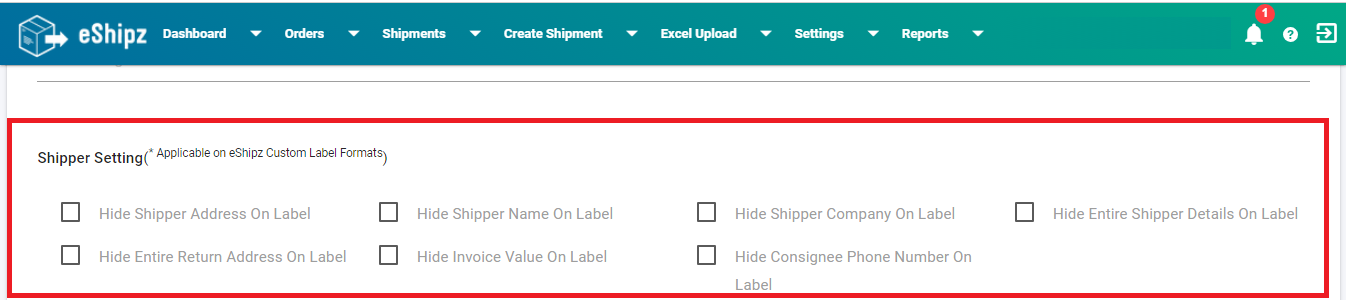
STEP 9:
Enabling the “Hide Shipper Address On Label” checkbox, hides the shipper address on the label i.e., shipper address will not be displayed on label.
Enabling the “Hide Shipper Name On Label” checkbox, hides shipper name on the label.
Enabling the “Hide Shipper Company On Label” checkbox, hides shipper company name on the label.
Enabling the “Hide Entire Shipper Details On Label” checkbox, hides entire shipper details on the label.
Enabling the “Hide Entire Return Address On Label” checkbox, hides the return address on the label.
Enabling the “Hide Invoice Value On Label” checkbox, hides the invoice value on the label.
Image:9
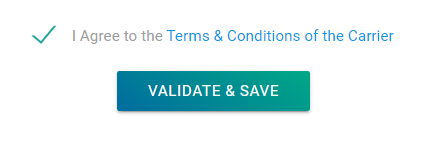
Check the “I Agree to the Terms & Conditions of the Carrier” checkbox after reading the terms and conditions document and click on the “Validate & Save” button.
Image:10.1
“Updated credentials Successfully!” message will be displayed on the ‘Shipper Accounts’ page.
Image:10.2

STEP 11:
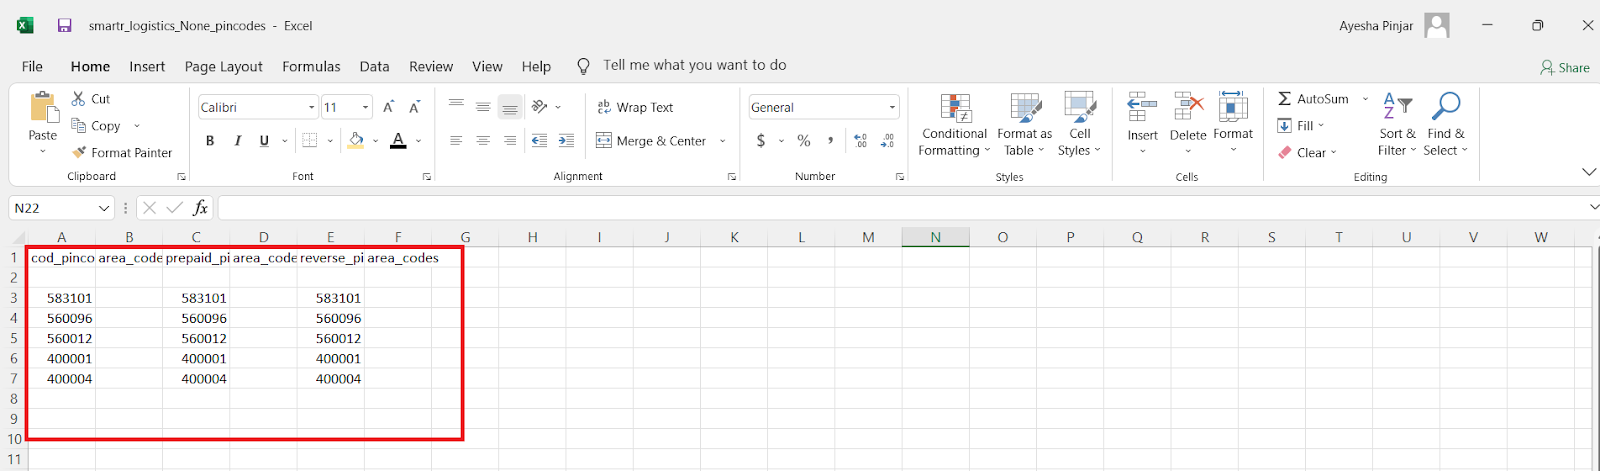
Click on ‘Edit’ icon for the account created in the above step on ‘Shipper Account’ page, ‘Edit Shipper Account For Carrier‘ page will be displayed, scroll down till “Pincode” block and click on ‘DOWNLOAD CSV FORMAT FILE’ link, the file will be downloaded and fill all the Prepaid and COD pin codes in the file and upload the file by clicking on ‘Upload’ button.
Image:11.1
Image:11.2
Image:11.3

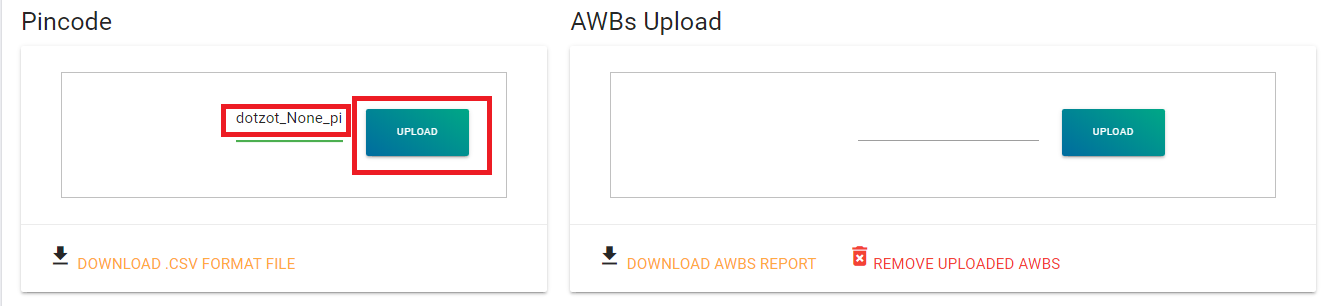
A Success message will be displayed stating ‘Pin Codes have been uploaded!’
Image:11.4

AWBS Upload:
Click on the ‘Edit’ icon for the account created on ‘Shipper Account’ page, ‘Edit Shipper Account For Carrier‘ page will be displayed, scroll down till “AWBs Upload” block and click on ‘DOWNLOAD AWBS REPORT’ link, the file will be downloaded and fill all the Prepaid ,COD and Reverse AWBs[tracking number] in the file and upload the file by clicking on ‘Upload’ button.
Image:12.1


Image:12.2
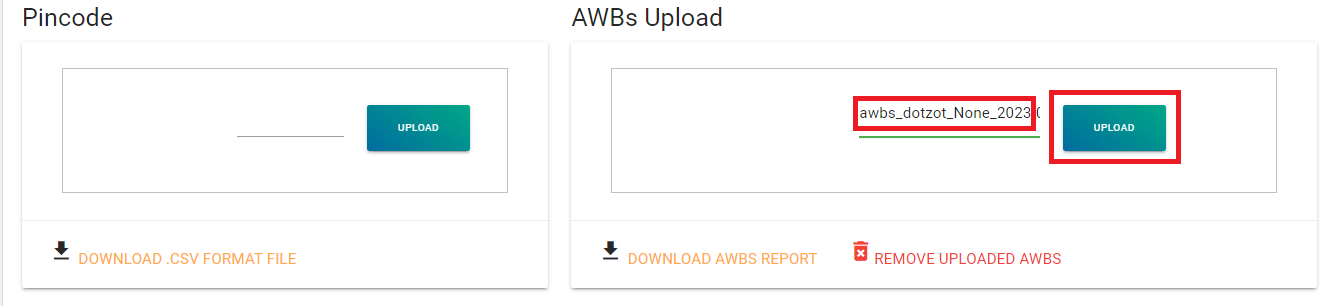
Image:12.3
A Success message will be displayed stating ‘Provided AWBs have been uploaded!’
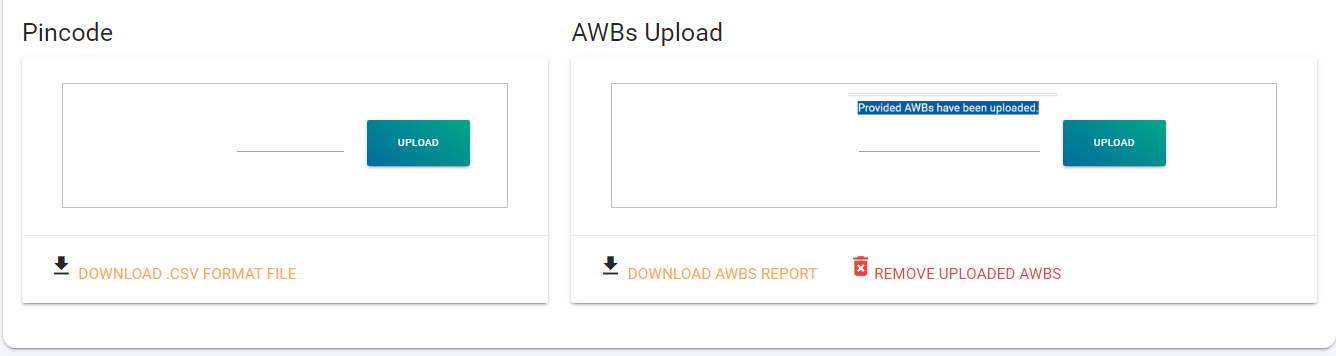
Image:12.4
Related Articles
Steps to integrate Expeditors Carrier
STEP 1: On eShipz platform dashboard, click on the “Settings” tab and under Integrations, select “Carriers”. Image: 1 Step 2: The “Shipper Accounts” page will now be displayed. Click the “+” icon visible at the top right corner. Image: 2 STEP 3: The ...Steps integrate PICOXPRESS carrier
Step 1: Log in to your eShipz account. Step 2: Go to Settings. Step 3: Click on Carriers. Step 4: The “Shipper Accounts” page will now be displayed, click on ‘+’ icon visible at the top right corner. Step-5: Select Picoxpress from the list of ...Steps to integrate INDIA POST OFFLINE carrier
Follow the steps below to integrate India Post Offline with your eShipz account.This is the B2C carrier. Step 1: Log in to eShipz Log in to your eShipz account using your credentials. Step 2: Navigate to Carrier Configuration Go to Settings. Click ...Steps to integrate DTDC LTL carrier
This article provides a comprehensive guide on how to integrate DTDC's Less Than Truckload (LTL) carrier services with your eShipz account. By following these steps, you can leverage eShipz's powerful multi-carrier platform to manage, track, and ...Steps to integrate Criticalog carrier
CriticaLog Carrier Setup Guide Step-by-step with screenshots. blue boxes in each image mark where to click. Step 1: Log in to your eShipz account. Step 2: Go to Settings. Step 3: Click on Integrations and select Carrier Configuration Step 4: Open ...