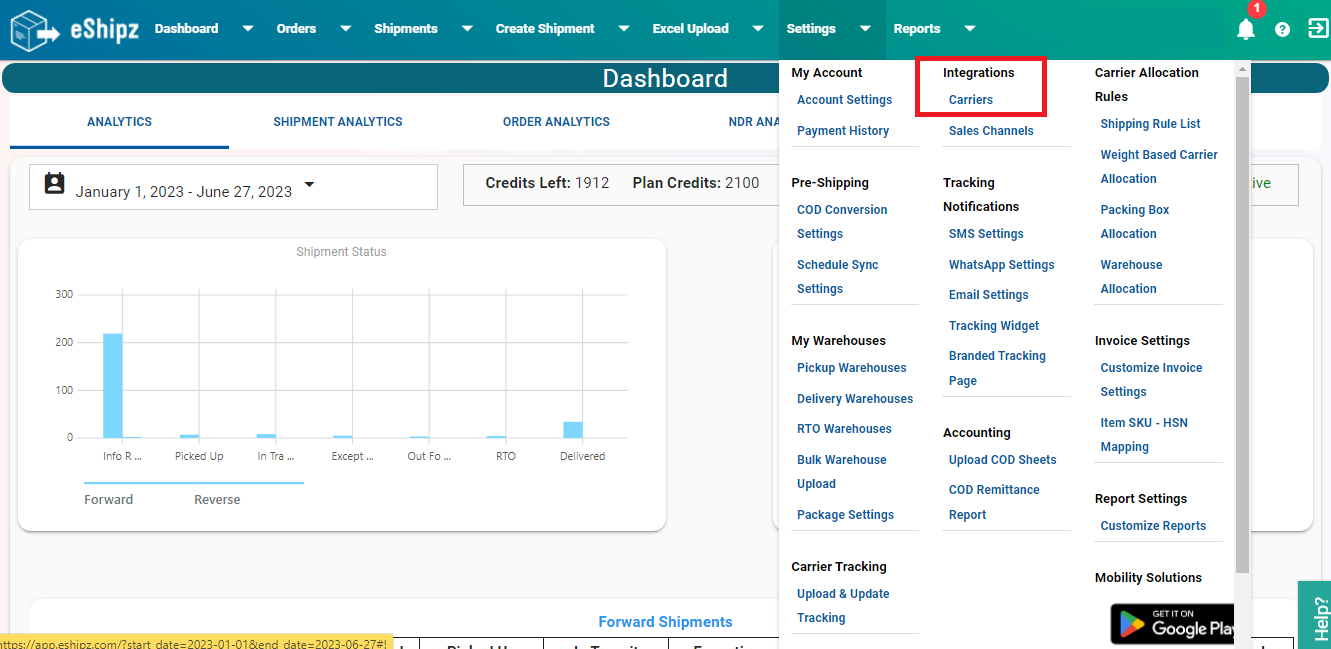
Steps to integrate FedEx Carrier
STEP 1:
STEP2:

STEP3:

STEP 4:
For remote area delivery, enable ‘Allow ras shipments’ checkbox, enabling this might incur extra charges on shipping charge for remote area delivery
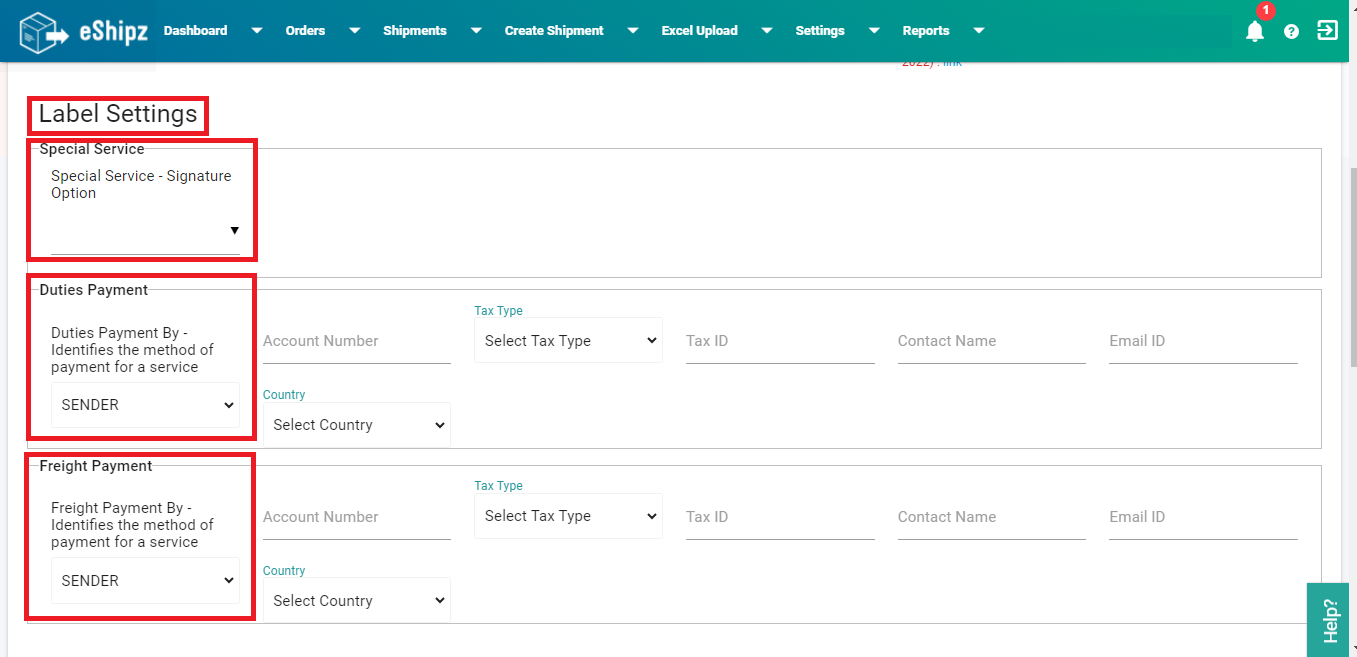
For ‘Label Settings’

Special Service-Signature Option- Based on the type of the signature you require for delivery confirmation from the destination, select any one of the option from the drop-down
[‘ADULT‘ – Signature will be taken from someone at the delivery address who is at least of age of 18 & above
‘DIRECT’- Someone at the recipient’s address must sign for the delivery.
‘INDIRECT’- Someone at the delivery address or from somebody nearby.
‘NO_SIGNATURE_REQUIRED’- There are many shipments for which FedEx does not require a signature from the recipient.]
Duties Payment By - Identifies the method of payment for a service – Select ‘SENDER’/ ‘Recipient’/ ‘Third_Party’ from the dropdown
a.) If ‘Sender’ is selected from the dropdown, then Sender will be responsible to pay the duties
b.) If ‘Recipient’ is selected from the dropdown, then entered Recipient account number will be responsible to pay the duties
c.) If ‘Third_Party’ is selected from the dropdown, then entered Third_Party account number will be responsible to pay the duties
Freight Payment By-Identifies the method of payment for a service
a.) If ‘Sender’ is selected from the dropdown, then Sender will be responsible to pay the freight charges.
b.) If ‘Recipient’ is selected from the dropdown then the Recipient account number entered will be responsible for the freight charges.
c.) If ‘Third_Party’ is selected from the dropdown then Third_Party account number entered will be responsible for the freight charges.
STEP 5:

STEP 6:
Check the “I Agree to the Terms & Conditions of the Carrier” Checkbox and click on the “Validate & Save” button.

“Updated credentials Successfully!” message will be displayed on ‘Shipper Accounts’ page.

STEP 7:
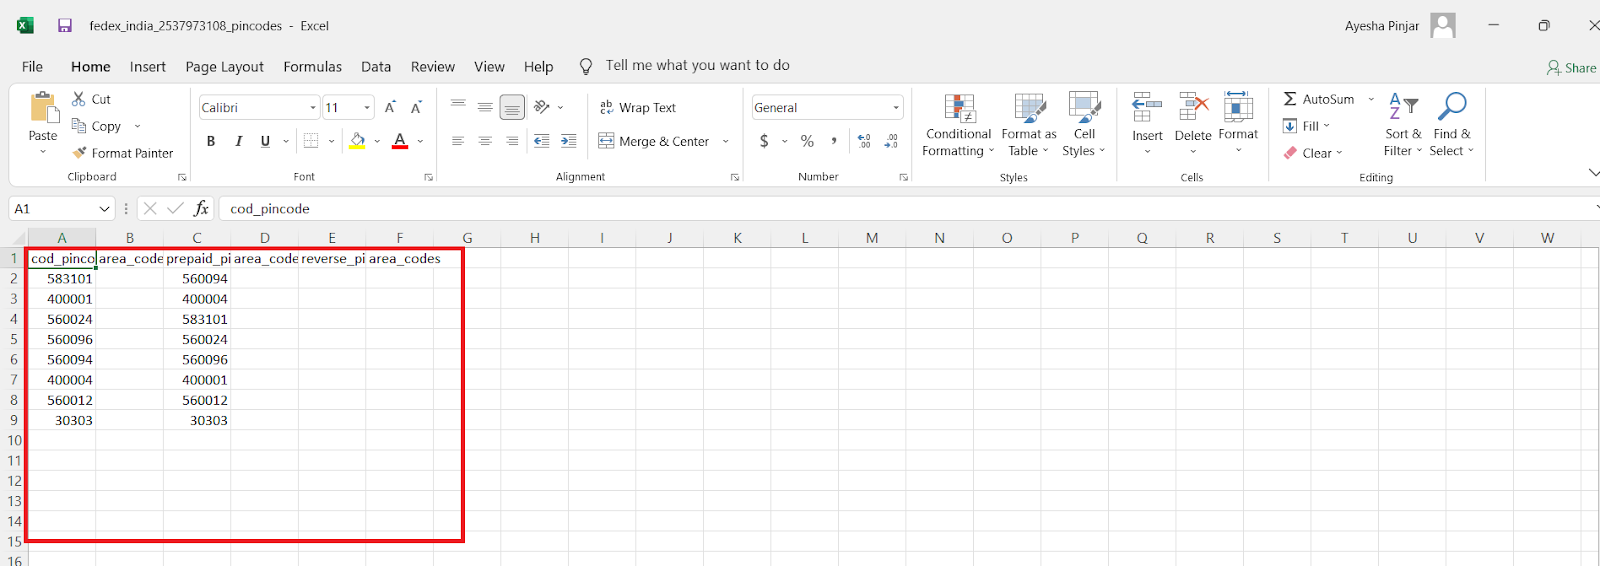
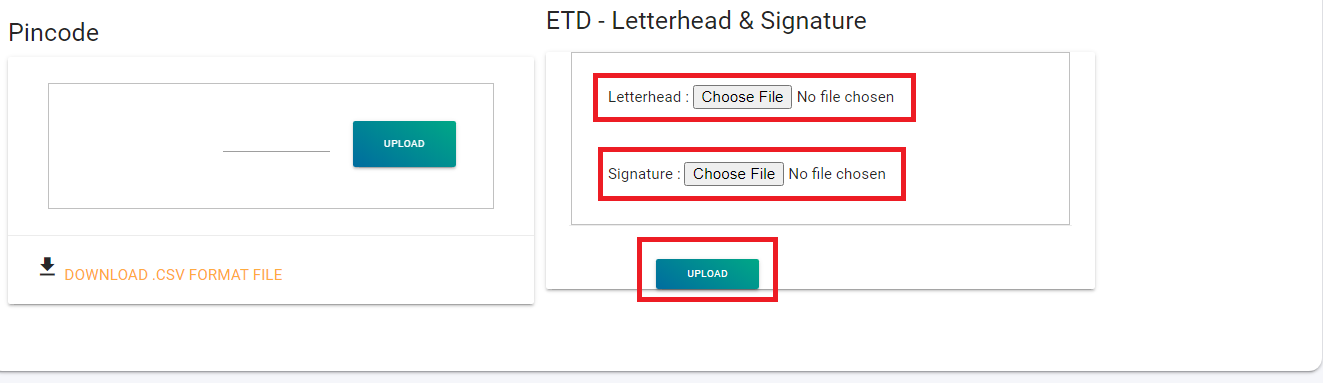
Serviceable Pin Code Upload [Applicable for only Domestic shipments i.e., with in INDIA]
Click on the ‘Edit’ icon for the account created on the ‘Shipper Account’ page, ‘Edit Shipper Account For Carrier‘ page will now be displayed, scroll down till the “Pincode'' section and click on ‘DOWNLOAD CSV FORMAT FILE’ link, the file will be downloaded. Fill in all the Prepaid and COD pincodes in the file and upload the file by clicking on the ‘Upload’ button.

if the file is uploaded successfully a message will be displayed stating that the ‘Pincodes have been uploaded!’
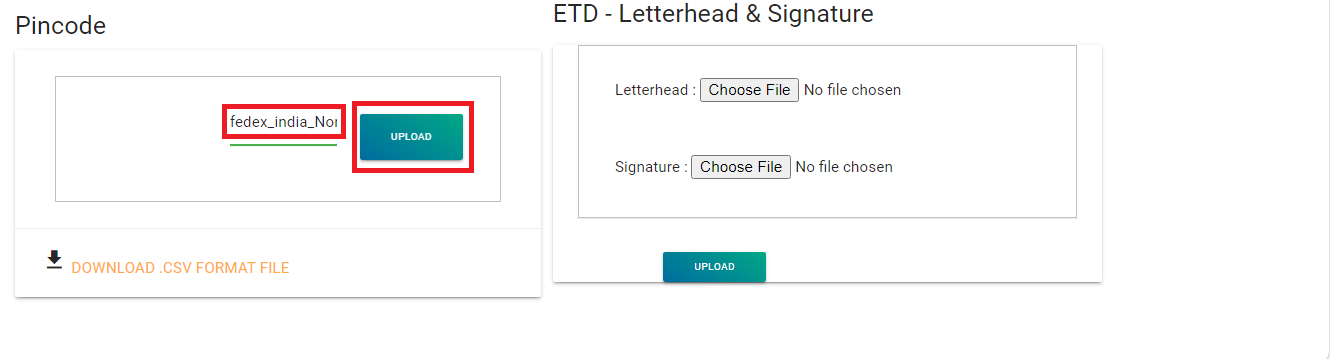

STEP 8:
ETD - Letterhead & Signature upload
Now, you can go ahead and create shipments for the configured FedEx carrier.
Related Articles
Steps to integrate Expeditors Carrier
STEP 1: On eShipz platform dashboard, click on the “Settings” tab and under Integrations, select “Carriers”. Image: 1 Step 2: The “Shipper Accounts” page will now be displayed. Click the “+” icon visible at the top right corner. Image: 2 STEP 3: The ...Steps integrate PICOXPRESS carrier
Step 1: Log in to your eShipz account. Step 2: Go to Settings. Step 3: Click on Carriers. Step 4: The “Shipper Accounts” page will now be displayed, click on ‘+’ icon visible at the top right corner. Step-5: Select Picoxpress from the list of ...Steps to integrate INDIA POST OFFLINE carrier
Follow the steps below to integrate India Post Offline with your eShipz account.This is the B2C carrier. Step 1: Log in to eShipz Log in to your eShipz account using your credentials. Step 2: Navigate to Carrier Configuration Go to Settings. Click ...Fedex ETD Documents upload - Steps
FedEx ETD: FedEx Electronic Trade Documents (ETD) is an international shipping solution that allows you to submit your customs documentation electronically. eShipz, as a Certified FedEx Compatible Solution now supports ETD at both At/Post shipment ...Steps to integrate DTDC LTL carrier
This article provides a comprehensive guide on how to integrate DTDC's Less Than Truckload (LTL) carrier services with your eShipz account. By following these steps, you can leverage eShipz's powerful multi-carrier platform to manage, track, and ...